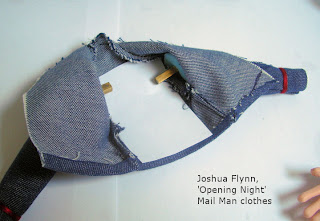
You can find part one HERE.
Now where were we?
White Shirt
I decided not to make a whole shirt for the Mail Man since only parts of it are visable from under his jacket. Instead, I made the shirt in sections at the cuffs and collar area, creating the illusion of a full white shirt. This made the construction much easier and also stopped the puppet from becoming overly padded around the arms and torso, from too many layers of fabric.
Using a paper template as a guide, I cut four pieces of white cotton fabric to make up the collar area. Two on the back and two on the front to curve around the neck and shoulders. Any visible edges were glued back on themselves with contact adhesive to stop the fabric from fraying. I also added a tube of card into space where the silicone neck slots into the body, to give the collar area some support.
The shirt fabric was glued straight onto the puppet padding using contact adhesive. The next step was to make the shirt collar. For this I needed the puppets silicone neck in place to make sure the collor fits tightly, yet still allows the ability to remove the neck if nessisary.
The shape of the collar was first roughed out in paper and then transferred to fabric. To the top left of the image above is a picture of my first attempt using just fabric. I found that the contact adhesive used to glue the edges left a yellowish stain through the fabric and the collar didn't hold it's shape very well. For collar mark II (to the upper right) the edges of the fabric were glued to a piece of white card which was folded inside the collar, stopping any yellow stains from showing through and giving the collar strength.
Red Tie
To make the tie I used a wide piece of red silk ribbon folded and glued around a paper template.
In a similar way to the card in the shirt collar, The paper helped to stiffen the ribbon and stop the glue from staining. The top of the ribbon was folded into an 'M' shape and pinched together to create the small fold under the knot. A small strip of ribbon was then folded over a triangle of white sponge to create the knot.
The sponge helped to give the knot some shape and stopped the ribbon from looking too flat and fake. The tie was then glued onto the white shirt using contact adhesive. The two scruffy edges either side of the knot were glued down and covered by the shirt collar.
To finish the shirt, the edges of the white fabric were trimmed around the shoulder to make it easier for the arms to slot into place. The image below shows the K&S brass tubing which allows the arms to be removed from the puppet along with the jacket.
Once on the puppet, the fabric panel on the back of the Mail Man's jacket felt a bit loose and moved every time I touched the shoulders. To stop this I glued a sheet of paper inside the back panel of the jacket which helped to stiffen the fabric.
Now that the shirt and tie were finished, the remaining edges of the jacket were trimmed and glued into place on top of the trousers.
The jacket collar was then created using a similar method as the shirt collar except there was no need for any card since the jacket fabric is much thicker. The Mail Man's uniform is now mostly complete, but to finish things off a few more details are needs.
Finishing Touches
My Mail Man's uniform design includes a number of small buttoned pockets along the front of the jacket. I made all the pockets for both Mail Man puppets at the same time to try and keep the dimensions of each pocket as close as possible.
Each pocket was made up of a blue fabric square with a triangular fabric shape folded over the top edge of each square. All edges were glued with contact adhesive and attatched to the uniform.
Buttons
Each Mail Man puppet needed two largeer buttons for the front of the jacket, four small buttons for each pocket and two more medium buttons for each cuff.
Each button was then painted with a metalic painted for a brass effect. I used a strip of tape to keep each buton in place while painting. once dry, I coated the buttons with Araldite (clear two part epoxy) giving them a glossy shine. This also created a strong potctive glaze to stop the paint from scratching off. The buttons were attatched to sticks for this to stop the epoxy from pooling around each button.
The buttons were then attatched to the uniform with contact adhesive.
Finnished Uniform
Here are a few pictures of the two Mail Man puppets with finished clothing. Note-the hands are only temporary.
This post has been a bit longer than usual. I think here is a good place to stop.
Thanks for looking.


Interesting post... thanks for sharing with us.
ReplyDeleteo.O I think my eyes would melt trying to work at that scale. You're entirely awesome :)
ReplyDeleteHope the film is going well! Only just found your blog so I'm going to go and nose at the rest of it :)
x
Too perfect! So clean and professional!
ReplyDeleteExtremely well done!
ReplyDelete